Installation Guide
This document will provide instructions on how to install and activate the SlimStat and SlimStat Pro plugins on your WordPress website. Follow the instructions in this guide to get the SlimStat plugin up and running on your website, gain insights into your website traffic, and protect your customers’ privacy with reliable answers.
SlimStat:
Here, we provide various methods for installing the SlimStat plugin on your WordPress website:
Method 1: Install from WordPress Plugins Directory (Recommended)
- Log in to your WordPress Admin Panel.
- Navigate to Plugins from the Dashboard Sidebar Menu.
- Under the Plugins submenu, click Add New.
- Search for “SlimStat”.
- Install and Activate the plugin.
- You’ll see a new “SlimStat” menu item appear in the Dashboard Sidebar Menu once the plugin is activated.
Method 2: Install by Uploading the SlimStat File to the WordPress Dashboard
- Download the SlimStat plugin.
- Log in to your WordPress Admin Panel.
- Navigate to Plugins from the Dashboard Sidebar Menu.
- Under the Plugins submenu, click Add New.
- Use the Upload Plugin on the top left to upload the zipped file of SlimStat.
- After activating the plugin, you’ll see the “SlimStat” menu item appear in the Dashboard Sidebar Menu.
Method 3: Install by Using FTP
- Download the SlimStat plugin.
- Upload ‘wp-slimstat’ to the ‘/wp-content/plugins/’ directory.
- Log in to your WordPress Admin Panel.
- Activate the plugin through the Plugins menu in the Dashboard Sidebar Menu.
- Upon activation, the SlimStat plugin will add an “SlimStat” menu item to the Dashboard Sidebar Menu.
SlimStat Pro:
Before installing SlimStat Pro, ensure that you have not installed any legacy SlimStat Add-Ons. If any are installed, please disable and remove them, as SlimStat Pro already includes all the functionalities of SlimStat’s Add-Ons.
Here, we provide various methods for installing the SlimStat Pro plugin on your WordPress website:
Method 1: Install by Uploading the SlimStat File to the WordPress Dashboard
- Buy a license that works for you.
- Log in to your account and download the latest version of the “SlimStat Pro” plugin.
- Log in to your WordPress Admin Panel.
- Navigate to Plugins from the Dashboard Sidebar Menu.
- Under the Plugins submenu, click the Add New.
- Use the Upload Plugin on the top left to upload the zipped file of the plugin.
- After activating the plugin, you will find a new menu item on your Dashboard Sidebar Menu, “SlimStat”
Method 2: Install by Using FTP
- Buy a license that works for you.
- Log in to your account and download the latest version of the “WP-SlimStat Pro” plugin.
- Upload ‘wp-slimstat-pro’ to the ‘/wp-content/plugins/’ directory.
- Log in to your WordPress Admin Panel.
- Activate the plugin through the Plugins menu in the Dashboard Sidebar Menu.
- After installation, you will find a new menu item on your Dashboard Sidebar Menu, “Slimstat.”
Activating the License
When you install and activate SlimStat Pro, you need to activate your license key:
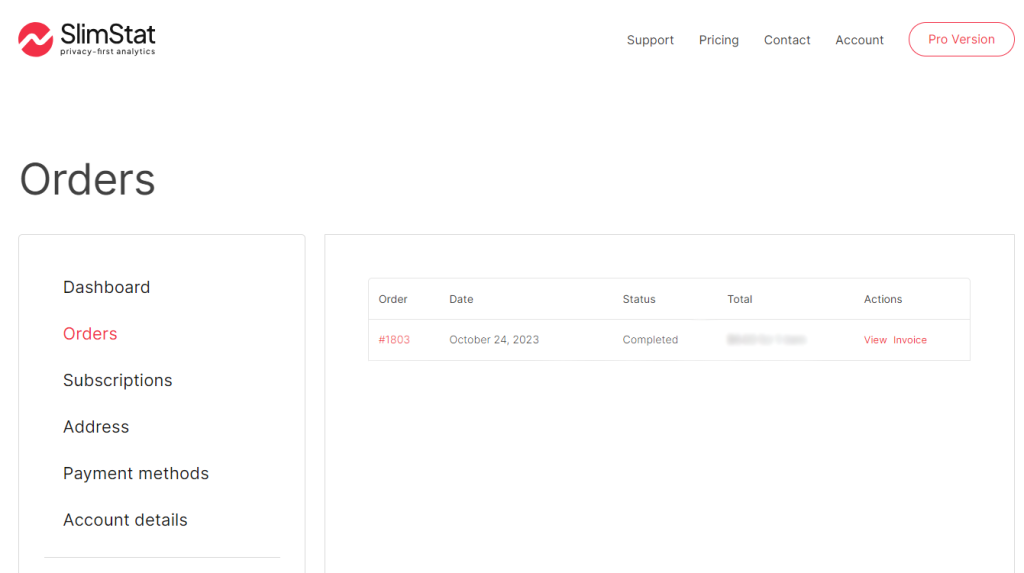
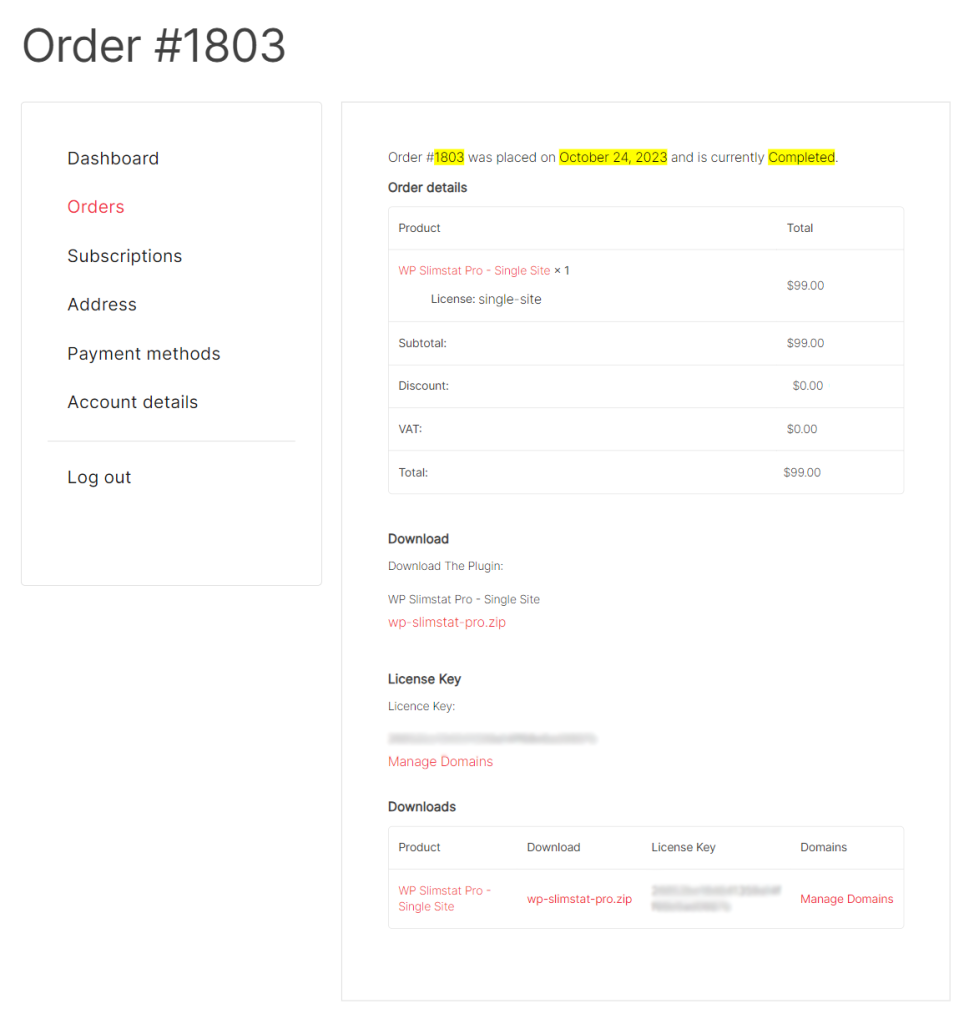
- Go to your account.
- Copy your license from the Orders tab.
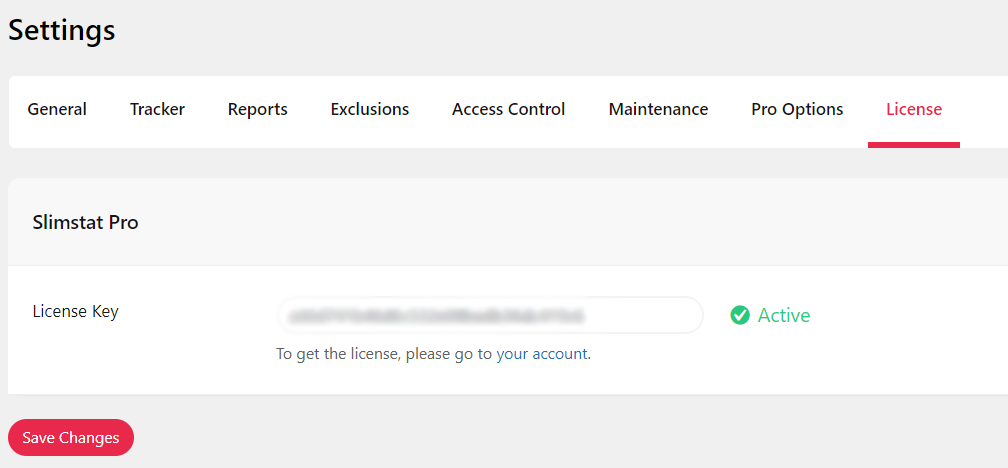
- Go to SlimStat → Settings and Save Changes to activate your license and access all the premium options.
*Note*: Both the WP SlimStat and WP SlimStat Pro plugins must be installed and enabled for the full functionality of the WP SlimStat plugin.